
Guide to starting a tool library in an apartment or condo building
The Idea Tree Consulting
December 10, 2014
Tool libraries are an increasingly popular form of collaborative consumption, a form of consumption where access and sharing is key, rather than individual ownership. Tools are a great candidate for this kind of sharing because you only need them once in a while and they have a long lifespan. Why should every individual in a neighbourhood or building have their own costly set of tools that they only use on rare occasions and take up limited space? Why not just have a communal set that people can sign out and use when they need them? It’s obvious why this trend is catching on; it just makes sense.
Large tool libraries like the Toronto Tool Library and the Vancouver Tool Library function much like the public libraries for books, which everyone is familiar with. You sign up for a membership and pay a fee, and visit one of the tool library locations when you want to borrow. The Toronto Tool Library has over 3000 tools and the Vancouver Tool Library has over 1600, and this doesn’t just include hammers and screwdrivers: welding torches, hedge trimmers, laser cutters and now even a 3D printer is among their inventories. These are great resources if you’re doing once-a-year yard maintenance, some DIY renovations or a weekend project.

The tool library we started at our last apartment building.
For more day-to-day needs, we started a tool library on a much smaller scale
for one of our previous apartment buildings. These tool libraries have the basic tools most people would need for quick bike repair, regular maintenance and minor fixes around the house. They are also shared among residents of a multifamily residential complex such as an apartment or condo building. Neighbourhood libraries are not impossible, but would be more difficult to administer in the same way due to lack of secure communal space.
Tool sharing amongst building residents is based on the already familiar sharing that residents do when it comes to laundry and recycling facilities. A tool library is just a small leap from there, and there should be a high enough number of people concentrated in one place to make small tool libraries worthwhile. There’s also an element of security in that only residents have access to the tools, just as they would only have access to their building, mailboxes or parking areas.
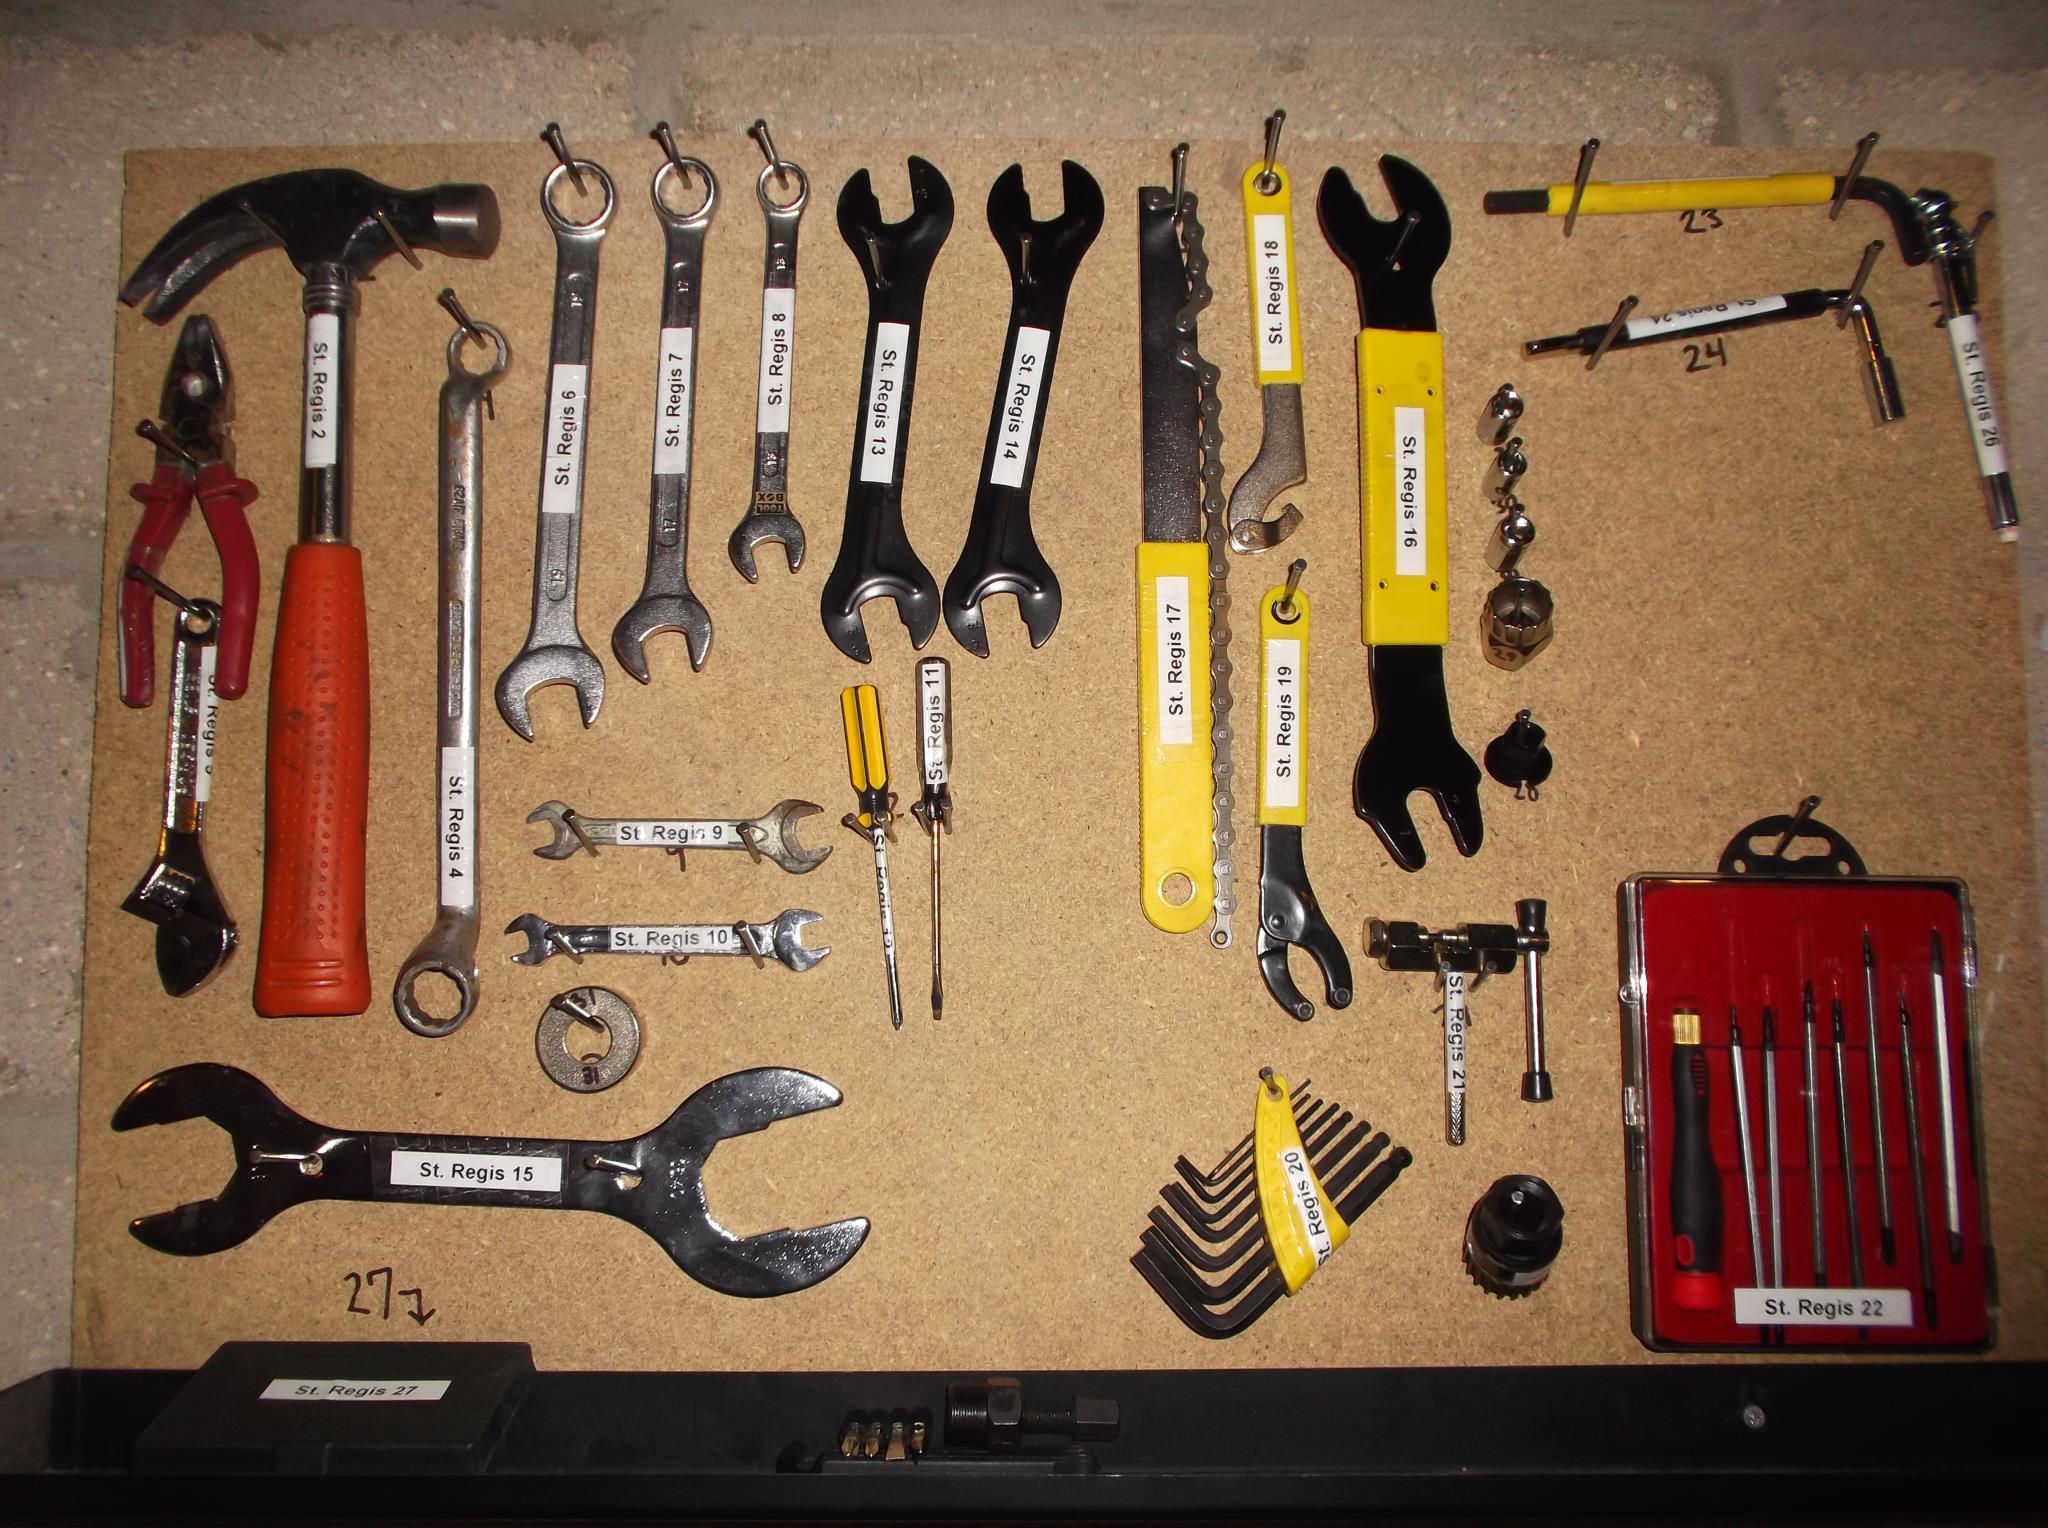
A close up of our tool library when it was shiny and new! A couple of the larger tools are out of frame.
Some key factors in starting a tool library for an apartment or condo building:
- Location: You’ll need a secure, communal place for the tools to live. In our case we used some wall space in one of the bike sheds. A secure indoor recycling or storage area would also function well.
- Funds: It shouldn’t be hard to collect donations of extra tools or to simply purchase a basic tool kit to start off your library. Look for some ways of funding your tool library, through the building council or a small scale city council grant. We created our tool library for roughly £50 or $100, which was enough for a bike tool kit and bike pump. We also contributed a few extra tools we had around the house, such as the hammer and saw.
- Choosing tools: our tool library was particularly geared towards bike repair, since we had a very high percentage of cycling commuters, and the building preferred even small maintenance to be provided by the building management. Condo buildings with owners may focus more on home repair. For example, our library didn’t have a caulking gun, tape measure or a power drill. Start off with a few essentials and it should become clear over time what tools would make good additions.
- Laying out and labeling: this point somewhat just appeals to a love of good organization, but also to creating a shared understanding that these tools are for everyone and should be respected and returned in a timely way. We put up each tool in its own spot on the board, and underneath was a number corresponding to the label on the tool (you can see this more clearly for number 23 and 24 in the upper right hand corner of the close-up photo). You can create whatever system works for your building, but do be sure to address this point; don’t just leave a mess of unlabelled tools in a tool box as they’ll be far more likely to go missing without anyone noticing and it’s not as inviting to use.
- Sign-out system: A clipboard with sign-out sheets also hung just below this board, and it was surprisingly well used for an honour-based system. There were two motivations here, one obviously to be able to track people down if they kept a tool out for too long, but also to collect data on how often and which of the tools were being used. For that reason we asked people to sign out a tool even if they only used it for a few minutes and intended on putting it right back, and people did appear to adhere to the rule. The advantage of running one of these within a building means you potentially have everyone’s contact information (or at least you know where they live!), so it’s not too difficult to follow up if necessary. We had only one tool go missing in the first year, which we thought was pretty good!
Good luck! We would love to hear about your tool library, send us your story and photos to hello@theideatree.ca or fire off a tweet to @IdeasOnTrees. You can also download a printable PDF of this guide here.